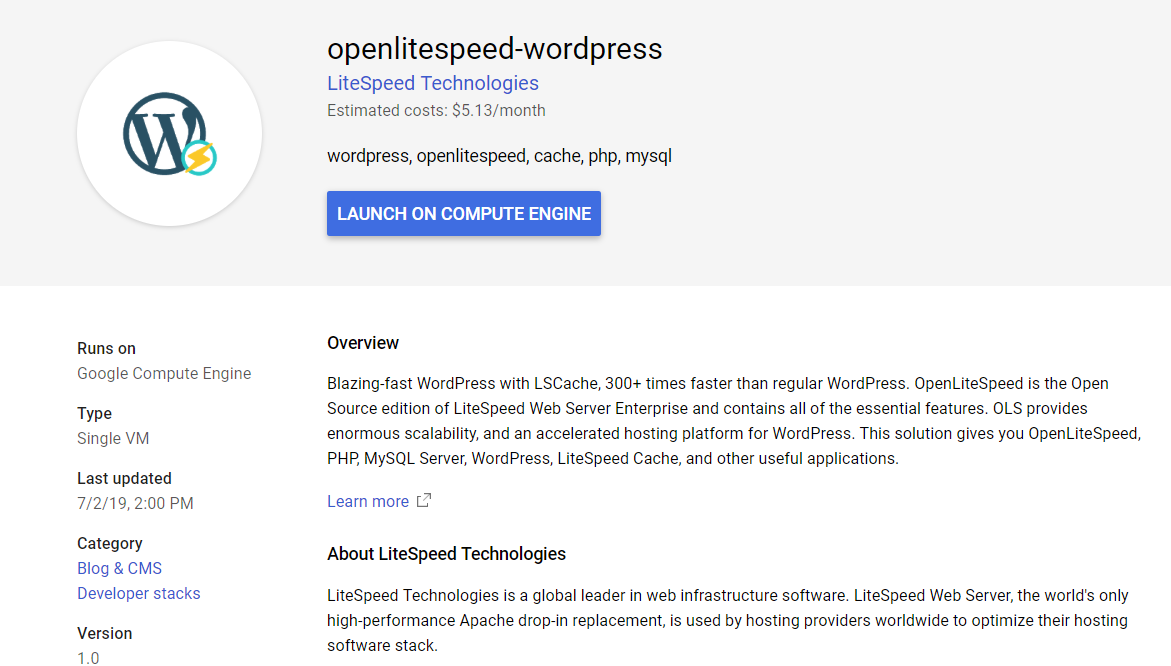
WordPress
The OpenLiteSpeed WordPress One-Click app is based on a standard WordPress image, but includes several great performance enhancements, including LiteSpeed's popular LSCache optimization plugin. This Wordpress + OpenLiteSpeed + LSCache image tends to be more than 300 times faster than a regular WordPress image!
OpenLiteSpeed WordPress One-Click automatically installs OpenLiteSpeed, LSCache, WordPress and any dependences. It also automates initial setup for components like Object Cache and PHP OPCache to reduce the time it takes to optimize a web server.
Quick Start
Step 1.
DigitalOcean
Use the "OpenLiteSpeed WordPress 1-Click app" to create a Droplet with any plan you want. Click here to create an account and get a $100 Digital Ocean credit.
Google Cloud Platform (GCP)
- Login to the Google Cloud Platform and click Launch a VM instance on Compute Engine.
Amazon Web Services (AWS)
Method 1. Through Subscribe
- Subscribe to WordPress with LiteSpeed Cache
- Click Continue to Launch and Launch
Method 2. Through EC2 console
- Open the Amazon EC2 console
- Locate the product by searching for "WordPress with LiteSpeed Cache" from AWS Marketplace
- Click Select,Continue,Preview and launch (the default is the most recent version)
Microsoft Azure Cloud (Azure)
- Login to the Azure Portal and click Image Link.
- Click the GET IT NOW and Create buttons
- Choose any server plan you'd like to use, and create the server
Linode
Use the "OpenLiteSpeed WordPress StackScripts" to create a server with any plan you want. Click here to create an account
Alibaba Cloud
Use the "OpenLiteSpeed WordPress" from Marketplace to create an ECS instance with any plan you want.
Step 2.
From a terminal on your local computer, connect to the server as root, like so:
ssh root@use_your_server_ip
AWS
ssh ubuntu@use_your_server_ip
GCP
Method 1. Through your SSH client
Instead of usingssh username@use_your_server_ipusernameto SSH with, you can find the right username by going to:Google Cloud Platform > Project > Compute Engine > Metadata > SSH Keys > Username
Method 2. Through platform built-in SSH client
- In the Cloud Console, go to the VM instances page
- In the list of virtual machine instances, click SSH in the row of the instance that you want to connect to
Be sure to substitute the server’s public IP address for use_your_server_ip.
Note
If you try to visit the server's IP address before you SSH to the server, you’ll see a LiteSpeed landing page.
Step 3.
An interactive script that runs will first prompt you for your domain or subdomain.
You can press CTRL+C and continue to SSH. The prompt will open again the next time you log in, and will continue to do so until you finish the whole setup.
Please input a valid domain:
Please verify it is correct. [y/N]
Tip
Enter the root domain only, then the system will add both the root domain and the www domain for you..
You can also automatically apply Let's Encrypt SSL if your domain is pointed to this server already. Enter y and your email address to finish the process.
Do you wish to issue a Let's encrypt certificate for this domain? [y/N]
Please enter your E-mail:
Please verify it is correct: [y/N]
Do you wish to force HTTPS rewrite rule for this domain? [y/N]
Do you wish to update the system which include the web server? [Y/n]
Step 4.
Visit the Server’s IP or Domain in your browser to finish the wordpress installation

Your system is installed and ready to use!
Tip
OpenLiteSpeed and LSCache are a powerful combination for your WordPress site, right out of the box. In addition, LSCache offers a variety of optimization features that can contribute to a superior PageSpeed score for your site. These features are disabled by default, but we encourage you to explore and experiment! Learn more about the LSCache plugin's settings.
Components
The OpenLiteSpeed One-Click Image installs several packages and performs other actions on your system.
Package Installation
| Component | Version |
|---|---|
| Linux | Ubuntu 18.04.1 |
| OpenLiteSpeed | Latest from LiteSpeedtech Repo |
| MariaDB | Latest from APT |
| PHP | Latest from LiteSpeedtech Repo |
| phpMyAdmin | Latest from phpMyAdmin |
| LiteSpeed Cache | Latest from WordPress.org |
| memcached | Latest from APT |
| redis | Latest from APT |
| Certbot | Latest from Certbot’s PPA |
| Postfix | Latest from APT |
Other Actions
- Enables the UFW firewall to allow only SSH (port 22, rate limited), HTTP (port 80) and HTTPS (port 443) access.
- Sets the Unix Socket to Object Cache for better performance.
- Sets the MySQL root password, runs
mysql_secure_installation, and creates a WordPress user with the necessary permissions. - Sets up the
debian-sys-maintuser in MySQL so the system’s init scripts for MySQL will work without requiring the MySQL root user password. - Creates the initial WordPress configuration file to set up salt keys and allow the WordPress instance to connect to the database.
- Modifies some PHP settings to increase the maximum filesize and execution time.
- Enables the OpenLitespeed context to rewrite the
.htaccessfile so the WordPress permalink feature will work. - Tunes OpenLiteSpeed Web Server for better connectivity
| Item | Before | After |
|---|---|---|
| Max SSL Connections | 5000 | 10000 |
| lsphp Max Connections | 35 | 100 |
| PHP_LSAPI_CHILDREN | 35 | 100 |
How to Access the Installed Software
phpMyAdmin Access
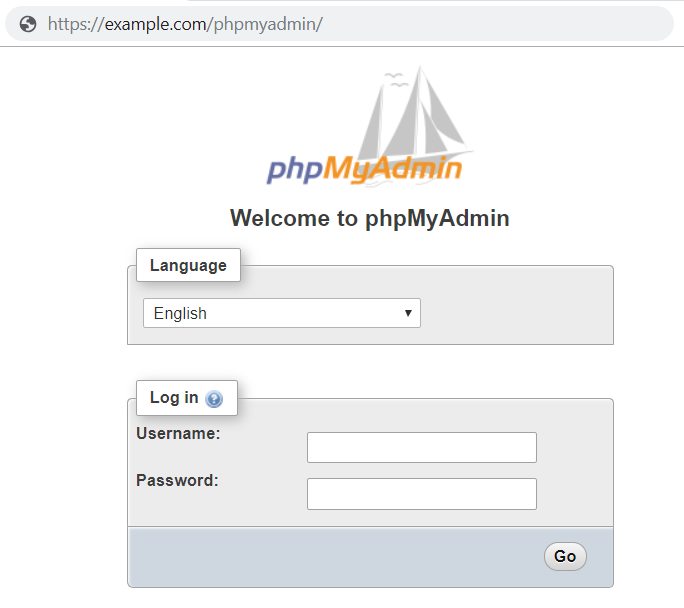
Connect to phpMyAdmin at the following URL:
https://example.com/phpmyadmin
Get the MySQL root password:
sudo sed -n 1p .db_password
sudo sed -n 2p .db_password
GCP
cat /home/ubuntu/.db_password
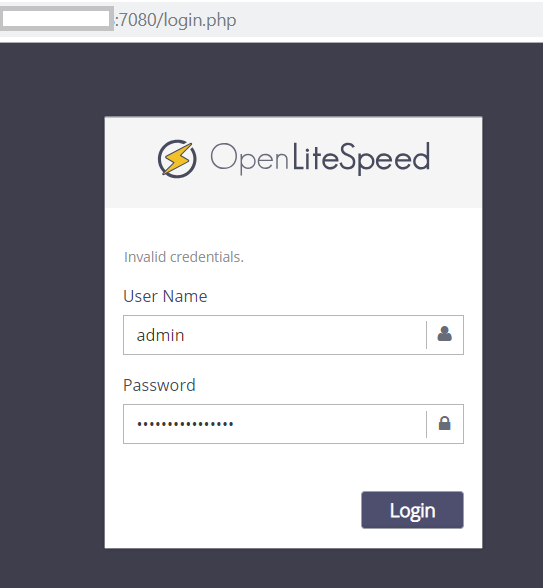
Web Server Control Panel Access
Get the WebAdmin admin password:
cat .litespeed_password
GCP
cat /home/ubuntu/.litespeed_password
Visit https://use_your_droplet_ip:7080 to access WebAdmin in a browser.
By default, WebAdmin uses port 7080. To allow access to 7080 from your IP(e.g. 1.2.3.4):
ufw allow from 1.2.3.4 to any port 7080
ufw allow 7080
ufw delete allow 7080
Benchmark Comparison
DigitalOcean
Use the following command to test from a $5 plan server(ab) to a $5 plan server(DOMAIN)
ab -n 10000 -k -H "Accept-Encoding: gzip,deflate" -c 10 http://DOMAIN/
Requests per Second (The larger the number, the better)
| Apache | Openlitespeed+LSCache |
|---|---|
| 47 | 14750 |
AWS
Use the following command to test from a t2.micro server(ab) to a t2.micro plan server(DOMAIN)
ab -n 10000 -k -H "Accept-Encoding: gzip,deflate" -c 10 http://DOMAIN/
Requests per Second (The larger the number, the better)
| Apache | Openlitespeed+LSCache |
|---|---|
| 34 | 6780 |
Optional Setup
Enable HTTPS
Setting up an SSL certificate enables HTTPS on the web server, which secures the traffic between the server and the clients connecting to it. Certbot is a free and automated way to set up SSL certificates on a server.
Step 1. Register Domain
To use Certbot, you’ll need a registered domain name and DNS records:
-
An A record from the domain (e.g.,
example.com) to the server’s IP address -
An A record from the domain prefaced with
www(e.g.,www.example.com) to the server’s IP address.
Step 2. Add Domain to Listener
Navigate to OpenLiteSpeed Web Server WebAdmin > Listeners, and add Your Domain to HTTP/HTTPS.

Step 3. Certbot
Once the DNS records are set up, you can generate the SSL certificate. Be sure to substitute the correct domain name in the following command:
certbot certonly --webroot -w /var/www/html/ -d example.com -d www.example.com
/etc/letsencrypt/
Step 4. Set SSL for HTTPS
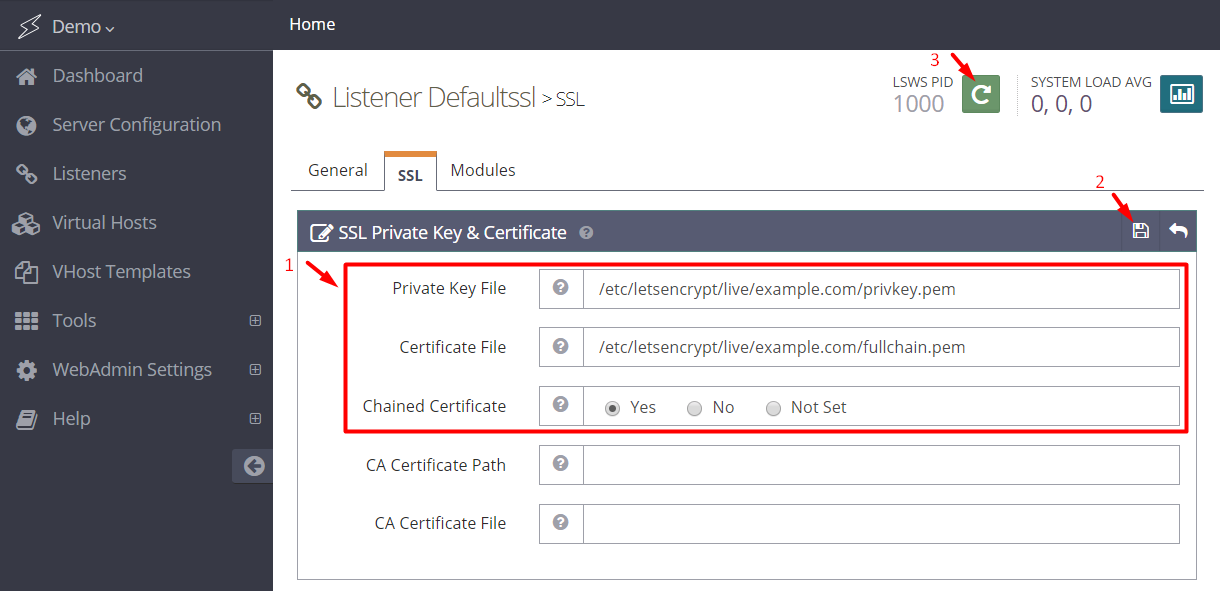
Navigate to OpenLiteSpeed Web Server WebAdmin > Listeners > SSL, and edit the following three items:
- Private Key File =
/etc/letsencrypt/live/example.com/privkey.pem - Certificate File =
/etc/letsencrypt/live/example.com/fullchain.pem - Chained Certificate =
Yes
Save and perform a Graceful Restart.
Now your server should support TLS1.1, TLS 1.2, and TLS 1.3.
Step 5. Redirect HTTP to HTTPS
HTTPS traffic on port 443 is already allowed through the firewall. After you set up HTTPS, you can optionally rewrite all HTTP traffic to HTTPS.
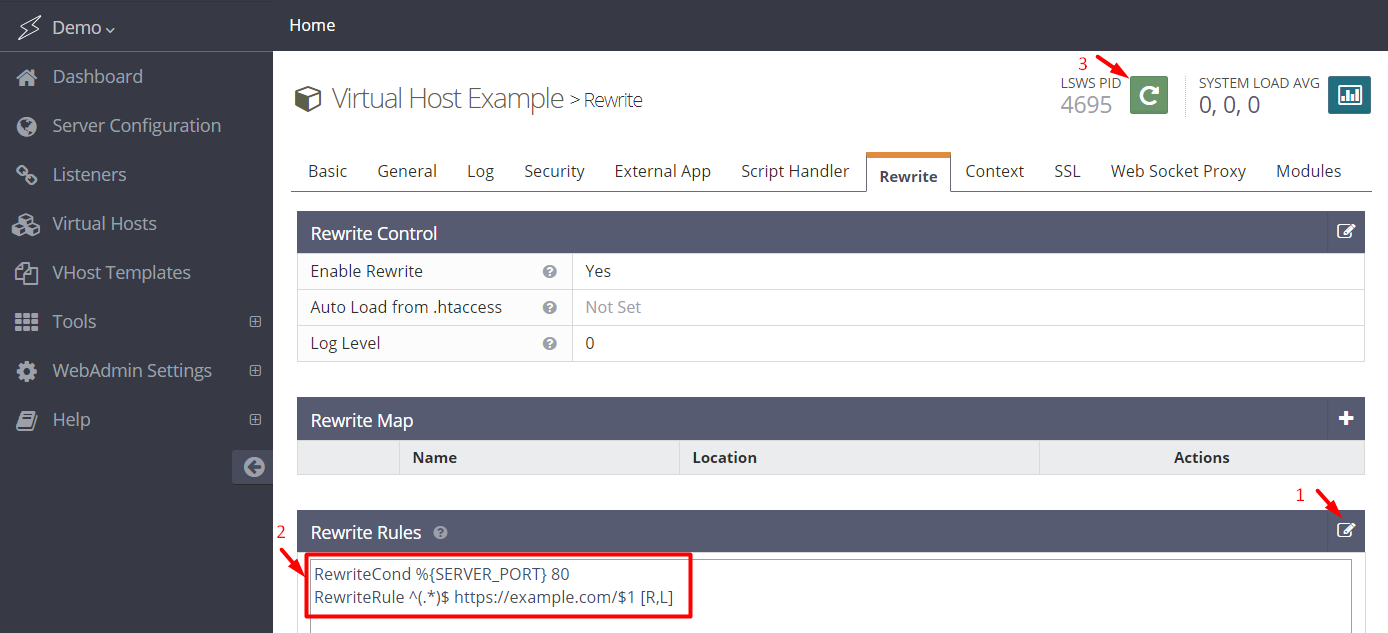
Add the following rules to OpenLiteSpeed Web Server WebAdmin > Virtual Hosts > Rewrite > Rewrite Rules
RewriteCond %{SERVER_PORT} 80
RewriteRule ^(.*)$ https://example.com/$1 [R,L]
Method for Uploading Files
You can serve files from the web server by adding them to the web root using SFTP or other tools.
Methods for Migrating Wordpress
If you already have a WordPress site elsewhere, you can migrate it using one of the following methods.
Single-Site by Duplicator Plugin
- Install and activate the Duplicator plugin on the WordPress site you’re copying from.
- Navigate to Duplicator > Packages, then click the Create New button.
- Go through the wizard. When you see "Package Completed," click the One-Click Download link to download two files.
- Move the two files (
installer.phpand a zip file) into the folder you’ll want the WordPress site in. - Visit
installer.phpin a web browser and you should see a wizard screen. - Click I have read and accept all terms & notices and Next
- You’ll need to have a database ready. Enter the database name, user, and password.
- Click the Site Login button and log in to your WordPress site using the same username and password as you have on the remote site.
Multi-Site by Duplicator Plugin
- Install plugin.
- Network activate plugin.
- On site 1, perform the backup. That will capture the entire site into a package.
- Restore the site in the new location just as in the Single Site procedure.
Manually by WordPress
Install LSCache After Migration
This step is only necessary if you have migrated a WordPress installation or it's a fresh wordpress installation.
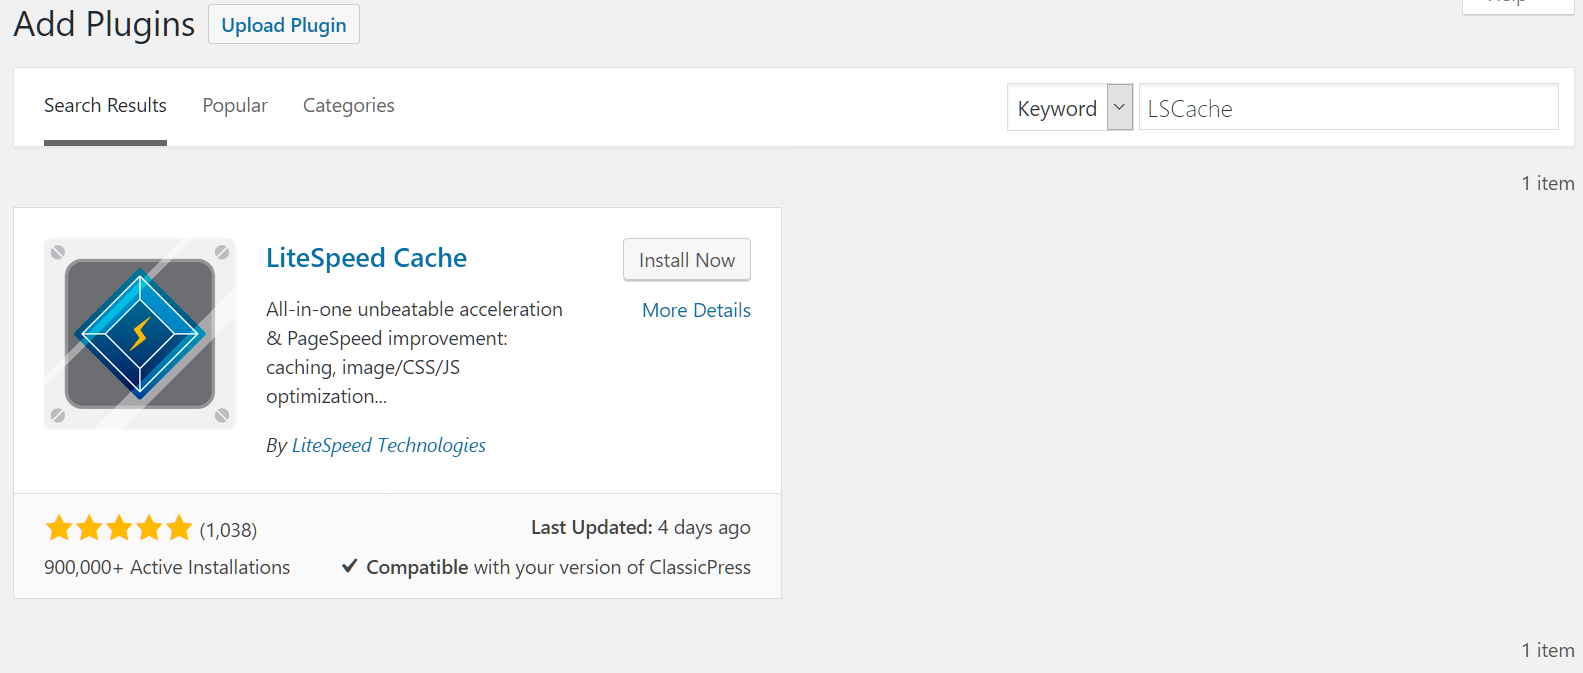
To benefit from high performance and a nice page score, don't forget to install the LSCache Plugin
Improve Your Page Score
Switch Object Cache Method
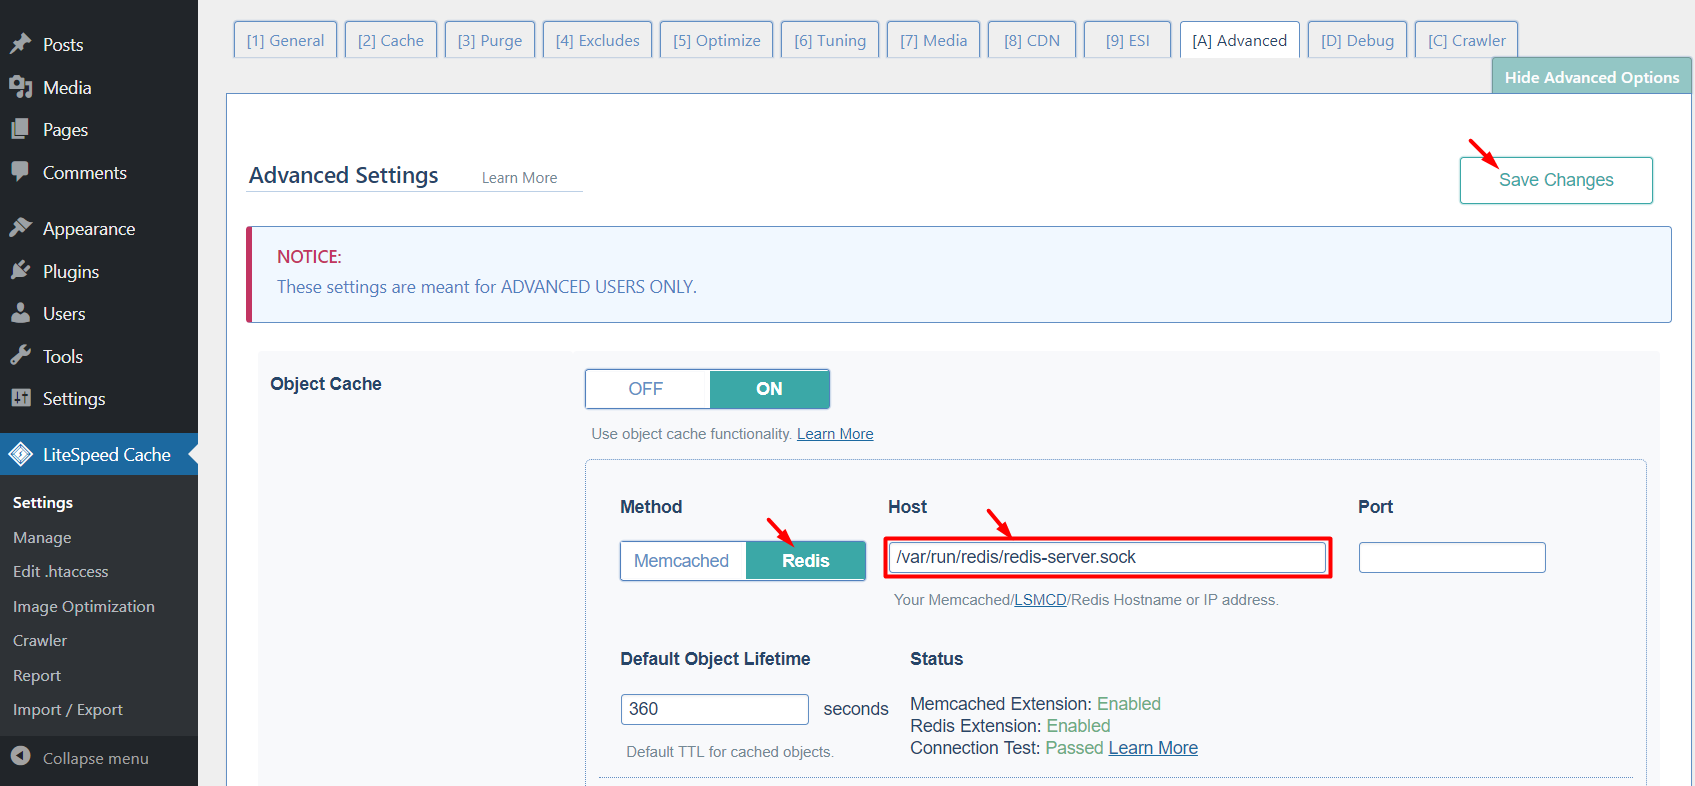
By default we have Memcached enabled. To swich to Redis is easy. Just copy the Redis socket path to LSCache Plugin > Settings > Advanced > Object Cache and save:
- Memcached:
/var/www/memcached.sock - Redis:
/var/run/redis/redis-server.sock
Frequently Asked Questions
How do I Reset my Web Server WebAdmin Password?
If you forget your password, you may run the following command to reset it:
/usr/local/lsws/admin/misc/admpass.sh
It will ask for the WebAdmin username, which should be admin. Then, enter your new password.
How do I Create Additional Virtual Hosts?
Auto Setup via Script
This method will automatically set up Listener/VirtualHost/Let's Encrypt/Force SSL/WordPress.
Interactive mode
wget https://raw.githubusercontent.com/litespeedtech/ls-cloud-image/master/Setup/vhsetup.sh
chmod +x vhsetup.sh
bash vhsetup.sh/bin/bash <( curl -sk https://raw.githubusercontent.com/litespeedtech/ls-cloud-image/master/Setup/vhsetup.sh )CLI mode
wget https://raw.githubusercontent.com/litespeedtech/ls-cloud-image/master/Setup/vhsetup.sh
chmod +x vhsetup.sh
bash vhsetup.sh -D www.example.com -LE admin@example.com -F -W/bin/bash <( curl -sk https://raw.githubusercontent.com/litespeedtech/ls-cloud-image/master/Setup/vhsetup.sh ) -D www.example.com -LE admin@example.com -F -W-
Please be sure that your domain is already pointing to the server when using
-LE YOUR_EMAIL -F -
Please be sure that your environment has php/sql service/sql root password when using
-Wfor WordPress CMS installation
Manual Setup
By default, OpenLiteSpeed has an example virtual host already created. You can create more virtual hosts if you like. See Create Virtual Hosts on OpenLiteSpeed.
How to upgrade to LSWS?
This script will:
-
Generate an Apache config file from OpenLiteSpeed config
-
Uninstall OpenLiteSpeed
-
Install LiteSpeed and read the Apache config file
/bin/bash <( curl -sk https://raw.githubusercontent.com/litespeedtech/ls-cloud-image/master/Setup/ols2ent.sh ) -L
Note
Do not run this script on a production server or critical site without running it on a test site first. Get help by using the -H parameter for more information including how to revert back to OpenLiteSpeed if needed.
How do I Verify if Cache is Working?
Visit your website using Chrome. Navigate to Chrome menu > More tools > Developer tools > Network, or simply use the shortcut Ctrl+Shift+I to bring it up. The test page may contain many requests, but you can just click your main domain to check the header. You might see X-LiteSpeed-Cache: miss or X-LiteSpeed-Cache: hit. Normally the first visit to a page is a miss, but subsequent visits should be a hit.
How Certbot's Auto Renew Script Works?
Image comes with cert auto renew by default in /etc/cron.d/certbot. This cron job would get triggered twice every day to renew certificate. Line certbot -q renew will check if certificate is getting expired in next 30 days or not. If it is getting expired then it will auto renew it quietly without generating output and auto restart web server by hook. If certificate is not getting expired then it will not perform any action. While renewing certificate it will use same information provided during certificate creation such as email address, domain name, web server root path etc.
How do I fix Object Cache test fail issue?
Sometimes system upgrade may cause config file being updated. So first thing you can do is to check user permission For Memcached:
vi /etc/memcached.conf
-u www-data
For Redis:
vi /lib/systemd/system/redis-server.service
Group=www-data
How Do I Set Up the PageSpeed Module?
You should not need to install the PageSpeed Module if the LiteSpeed Cache plugin for WordPress is already in use. Enabling both may degrade performance by 10% or more.
To install the module, please see the OpenLiteSpeed PageSpeed Module knowledgebase article.
How do I Create Additional Databases?
Method 1: Through phpMyAdmin
Method2 : Through SSH
Log into MySQL as root:
Add a new databasemysql -u root -pwordpress2and usernewuserwith passwordpassword:create database wordpress2; grant all privileges on wordpress2.* to 'newuser'@'localhost' identified by "password"; Flush priveleges; exit
How do I Install Postfix?
For Ubuntu (non interactive mode)
DEBIAN_FRONTEND=noninteractive apt-get -y \
-o Dpkg::Options::='--force-confdef' \
-o Dpkg::Options::='--force-confold' install postfix
For CentOS
yum -y install postfix
How do I Reconfigure Postfix?
Run the following command:
dpkg-reconfigure postfix
Configure the settings as follows:
-
General type of mail configuration?
Internet Site -
System mail name:
example.com(not mail.example.com) -
Root and postmaster mail recipient:
ubuntu(your user name) -
Other destinations to accept mail for:
<OK>(to use default value) -
Force synchronous updates on mail queue?
No -
Local networks:
127.0.0.0/8 [::ffff:127.0.0.0]/104 [::1]/128 -
Mailbox size limit:
0 -
Local address extension character:
+ -
Internet protocols to use:
all
Configure Postfix to Send Mail Using Gmail
How do I secure phpMyAdmin?
Method 1. Change your phpMyAdmin URL
- Navigate to WebAdmin > Virtual Hosts > Context
- Change URI from
/phpmyadminto (for example)/secure
Method 2. Require a Password
-
Log into SSH console and create a password file:
touch /usr/local/lsws/conf/PASS
chown lsadm:lsadm /usr/local/lsws/conf/PASS
-
Navigate to WebAdmin > Security
-
Set Realm Name =
example, and User DB Location =/usr/local/lsws/conf/PASS -
Click
/usr/local/lsws/conf/PASSto create a user/password -
Navigate to WebAdmin > Virtual Hosts > Context > phpmyadmin
-
Set Realm to
example
How do I Update phpMyAdmin?
The image comes with the latest phpMyAdmin version already, so you shouldn't need to update it. If you do need to update it, you can run the following commands:
cd /var/www/; mv phpmyadmin phpmyadmin.bak
wget https://www.phpmyadmin.net/downloads/phpMyAdmin-latest-all-languages.zip
unzip phpMyAdmin-*.zip; rm -f phpMyAdmin-*.zip
mv phpMyAdmin-* phpmyadmin
cp phpmyadmin.bak/config.inc.php phpmyadmin
chown -R www-data:www-data phpmyadmin
How do I Change PHP Parameters?
Edit the following file to configure PHP parameters:
vi /usr/local/lsws/lsphp73/etc/php/7.3/litespeed/php.ini
NOTE: We are using LSPHP 7.3 as example. If you are using a different version, please adjust the number in the URL accordingly. To increase the allowed file size, for example, you would make the following edits:
upload_max_filesize = 64M
post_max_size = 64M
Other parameters in the file may also be changed, if needed.
How do I Fix a Too Many Open Files Issue?
The default system value is 1024. To increase the value to e.g. 65535, please append following content to the /etc/security/limits.conf file:
* soft     nproc          65535
* hard     nproc          65535
* soft     nofile         65535
* hard     nofile         65535
root soft     nproc          65535
root hard     nproc          65535
root soft     nofile         65535
root hard     nofile         65535
session required pam_limits.so
ulimit -n command. Output should read 65535.
NOTE: 65535 is an example. Feel free to use a different value
How do I Set Up Virtual-Host-Specific PHP?
By default virtual hosts inherit the version of PHP that is set at the server level. You may wish to use a different PHP version for certain virtual hosts. Follow the steps below to set up virtual-host-level PHP. Here we will use the PHP version 7.4 as an example.
Install PHP 7.4 and commonly used PHP extensions:
apt-get install lsphp74 lsphp74-common lsphp74-curl lsphp74-imagick lsphp74-imap lsphp74-json lsphp74-memcached lsphp74-mysql lsphp74-opcache lsphp74-redis -y
Navigate to WebAdmin console > Server Configuration > External App > Add > Type > LiteSpeed SAPI App to set up a server-level external application. Set the following values:
- Name:
lsphp74 - Address:
uds://tmp/lshttpd/lsphp74.sock - Max Connections:
35 - Environment:
LSAPI_AVOID_FORK=200M - Initial Request Timeout (secs):
60 - Retry Timeout (secs):
0 - Command:
/usr/local/lsws/lsphp72/bin/lsphp - Instances:
1
Navigate to WebAdmin console > Virtual Hosts > your vhost > Script Handler > Add to add a virtual-host-level PHP handler. Set the following values:
- Suffixes:
php - Handler Type:
LiteSpeed SAPI - Handler Name:
[Server Level]:lsphp74
OpenLiteSpeed come with php detached mode by default, so need to restart php with command killall -9 lsphpnew to make settings take effect
API Creation
DigitalOcean
In addition to creating a Droplet from the Openlitespeed WP 1-Click application using the control panel, you can also use the DigitalOcean API.
The following example creates an Openlitespeed WP 18.04 Droplet called “My-Droplet” in the NYC3 datacenter, with 1 GB RAM:
curl -X POST "https://api.digitalocean.com/v2/droplets" \
    -d'{"name":"My-Droplet","region":"nyc3","size":"s-1vcpu-1gb","image":"openlitespeed-wp-18-04"}' \
    -H "Authorization: Bearer $TOKEN" \
    -H "Content-Type: application/json"
AWS
In addition to creating an instance from the WordPress with LiteSpeed Cache using the AWS Management Console, you can also use the AWS Command Line Interface.
The following example creates an t2.micro Instance with WordPress+LiteSpeed Cache AMI:
Please replace XXX to your own settings.aws ec2 run-instances --image-id ami-0b690d527a23ab535 \ --subnet-id subnet-XXXXXXX \ --security-group-ids sg-XXXXXXXXXXXXXX \ --count 1 \ --instance-type t2.micro \ --key-name XXXXXX \ --query "Instances[0].InstanceId"
GCP
Get the exact name of the WordPress image from LiteSpeed's project, gc-image-pub:
gcloud compute images list --project=gc-image-pub --filter="name ~ 'openlitespeed-wordpress'"
Create an instance, replacing INSTANCE_NAME with the name of your choice, and IMAGE_NAME with the name obtained from the previous command:
gcloud compute instances create INSTANCE_NAME --image-project=gc-image-pub --image=IMAGE_NAME
Azure
The first time you launch, you may need to accept the marketplace terms using the following command:
Find the release version you prefer:Get-AzureRmMarketplaceTerms \ -Publisher "litespeed_technologies" \ -Product "openlitespeed-wordpress" \ -Name "openlitespeed-wordpress" \ | Set-AzureRmMarketplaceTerms -AcceptLaunch VM from that image:az vm image list \ --location westus \ --publisher litespeed_technologies \ --offer openlitespeed-wordpress \ --all \ --output tableaz vm create \ --resource-group your-group \ --image litespeed_technologies:openlitespeed-wordpress:openlitespeed-wordpress:1.0.0 \ --name myVM \ --admin-username azure
Feel free to replace resource-group, image version, name, admin name, --generate-ssh-keys and more options with your own preferences.
Note
This request, like any other request that makes a change to your account, requires that your token has “write” scope assigned to it.