WordPress Cache Management
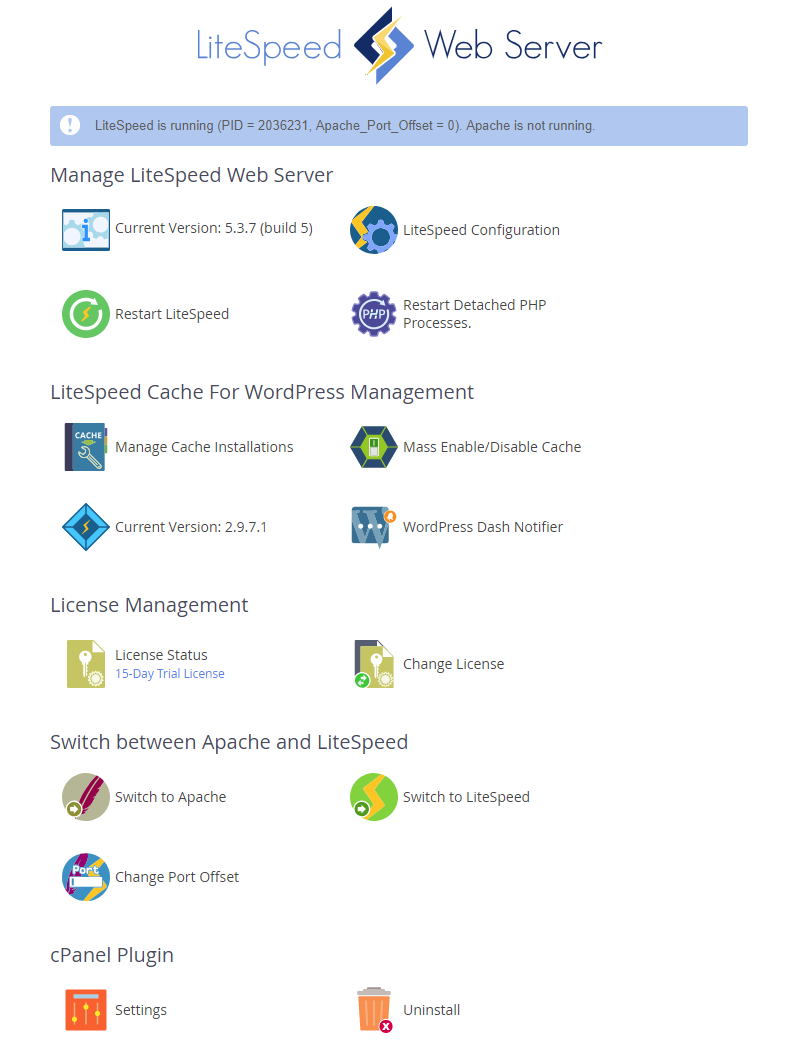
WHM Plugin - LiteSpeed Cache For WordPress Management
This page covers the various cache management options available through our WHM plugin's GUI interface. Most of these options are also available through the command line as the root user using our lscmctl CLI script.
The LiteSpeed WHM plugin contains a section for managing LiteSpeed Cache for WordPress. This guide will lead you through the different operations and management actions you can take when using our plugin.
If you do not see the LiteSpeed Cache For WordPress Management section on your LiteSpeed WHM plugin screen, please upgrade LiteSpeed Web Server to v5.1.x at the minimum.
You must have a license with LSCache enabled to use these features. How To Get LSCache
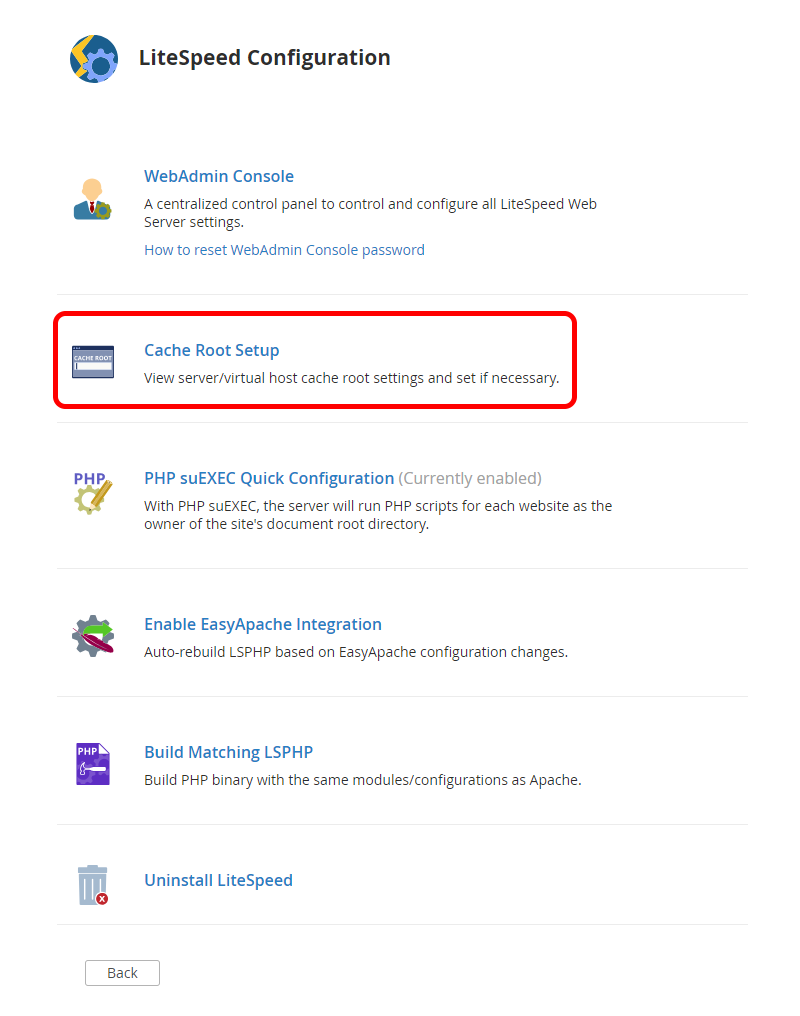
Cache Root Setup
Equivalent CLI commands: setcacheroot
Example: ./lscmctl setcacheroot [Go to CLI section]
Click WHM Plugin > LiteSpeed Configuration > Cache Root Setup
This screen searches for Server level cache root definitions in either
the /usr/local/apache/conf/includes/pre_main_global.conf file or in
the LiteSpeed Web Server Web Admin under Server > Cache > Cache
Storage Settings > Storage Path setting.

If it is defined in pre_main_global.conf it should look something like
this:
<IfModule LiteSpeed>
CacheRoot /home/lscache/
</IfModule>
Where /home/lscache/ is the CacheRoot path. In this case, the Server
level cache root will be set to /home/lscache/
This screen searches for VHost level cache root definitions in the
/usr/local/apache/conf/userdata/lscache_vhosts.conf file.
If it is defined in lscache_vhosts.conf it should look something like
this:
<IfModule LiteSpeed>
CacheRoot lscache
</IfModule>
Where lscache is the CacheRoot path. In this case, the VHost level
cache root will be set to /home/<user_folder>/lscache
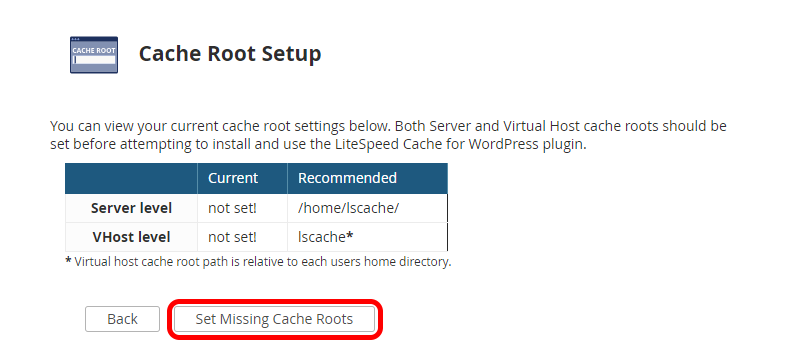
The Set Missing Cache Roots button sets Server level and VHost level Cache Root definitions if they are detected as not set.
Note
The Set Missing Cache Roots button will only appear if at least one of the two cache roots (Sever level or VHost level) is detected as not set.
Getting Started
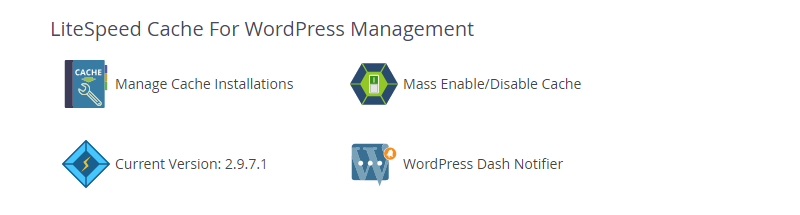
From the initial plugin screen you should be presented with 4 different options under the LiteSpeed Cache For WordPress Management section.
-
Manage Cache Installations allows you to manage LiteSpeed Cache for WordPress on your individual WordPress installations.
-
Mass Enable Cache & Mass Disable Cache can be used to enable/disable LiteSpeed Cache for WordPress on all discovered WordPress installations which are not flagged (more on flags later).
-
Version Manager displays the currently active LSCache for WordPress version (more on the Active Version later). It also allows you to adjust this active LSCache for WordPress version and to upgrade and downgrade LSCache for WordPress installations based on their current version.
-
WordPress Dash Notifier is used to recommend a plugin or broadcast a message to all discovered WordPress installations using the Dash Notifier plugin for WordPress.
Manage Cache Installations
Equivalent CLI commands: scan, enable, disable, flag, unflag,
status
Example: ./lscmctl scan -n [Go to CLI section]
The manage view is where most of the magic happens. Here you can manage LiteSpeed Cache for WordPress for your WordPress installations individually or in small groups. (There is nothing wrong with big groups, but that is what Mass Enable Cache and Mass Disable Cache are for)
The first time, a user may see only a Scan button available

After a scan and cache is enabled, it will look like this
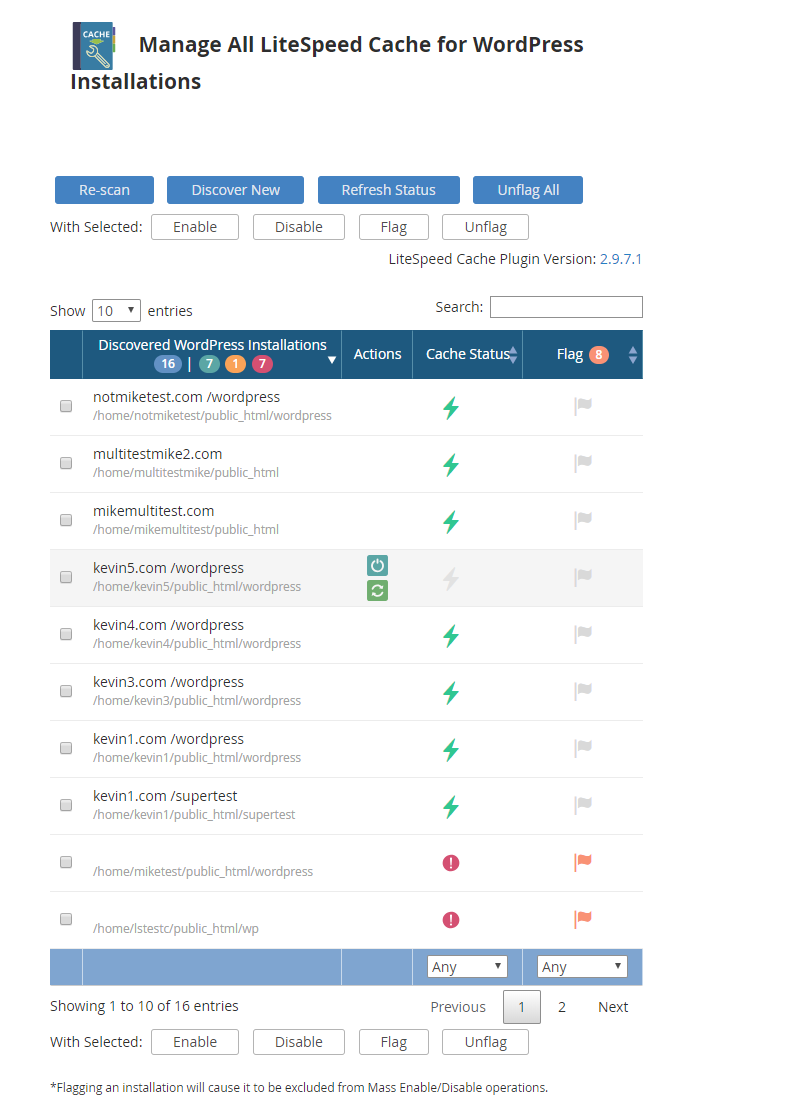
Starting from the actual table we have the following fields:
-
Discovered WordPress Installations - This field will contain the path of each WordPress installation discovered during the last scan operation.
-
Actions - This field contains action buttons that perform a specific action only for the related WordPress installation. These actions include Enable/Disable LiteSpeed Cache for WordPress, and Refresh Status which updates the current status of LiteSpeed Cache for WordPress for this installation only.
-
Cache Status - Displays the last known status of LiteSpeed Cache for WordPress for the listed WordPress installation.
-
Flag - Click to set Flag/Unflag. This field can either be blank or display a flag icon. While an installation is flagged, displaying the flag icon, it will be excluded from all future Mass Enable/Disable operations.
Looking at the top row of buttons, we have Scan/Re-scan, Discover New, and Refresh Status.
-
Scan/Re-scan - Discovers all WordPress installations under each cPanel users
public_htmlfolder. These discovered installations will then be saved to a data file and displayed in the manager screen. If this data file is removed or corrupted, simply scan again to repopulate the list. -
Discover New - Discovers all WordPress installations belonging to users not already listed in the Discovered WordPress Installations section. This will NOT discover new WordPress installations for existing users. For these cases, Scan/ Rescan should be used instead.
-
Refresh Status - Each listed WordPress installation will have a Cache Status of either "Enabled" or "Disabled" reflecting the status of LiteSpeed Cache for WordPress for that installation. The Refresh Status button will update this value to the most current status for all listed WordPress installations.
Moving on we have the the bottom row of buttons which are used to perform group operations. These buttons work in tandem with the check-boxes found next to each discovered installation to allow you to perform some basic operations for only the selected group.
-
Enable Selected & Disable Selected - These buttons allow you to enable and disable LiteSpeed Cache for WordPress for the selected WordPress installations.
-
Flag Selected & Unflag Selected - These buttons allow you to set or unset the flag field for the selected WordPress Installation. Flagged installations will be excluded from Mass Enable Cache and Mass Disable Cache operations.
-
LiteSpeed Cache Plugin Version - This label shows the currently active version of the LSCache Plugin for WordPress. Clicking the version number listed here will take you to the Version Manager screen.
Mass Enable Cache & Mass Disable Cache
Equivalent CLI commands: scan, enable, disable
Example: ./lscmctl enable -m [Go to CLI section]

Both of these selections behave in a very similar way by allowing you to enable/disable LiteSpeed Cache for WordPress en masse.
When Mass Enabling/Disabling LiteSpeed Cache for WordPress, all WordPress installations that are not currently flagged in the Manage screen will have LiteSpeed Cache for WordPress installed/removed. If a WordPress installation is detected as manually disabled, the WHM plugin will flag it and skip it. During this operation, you should see the following output screen.
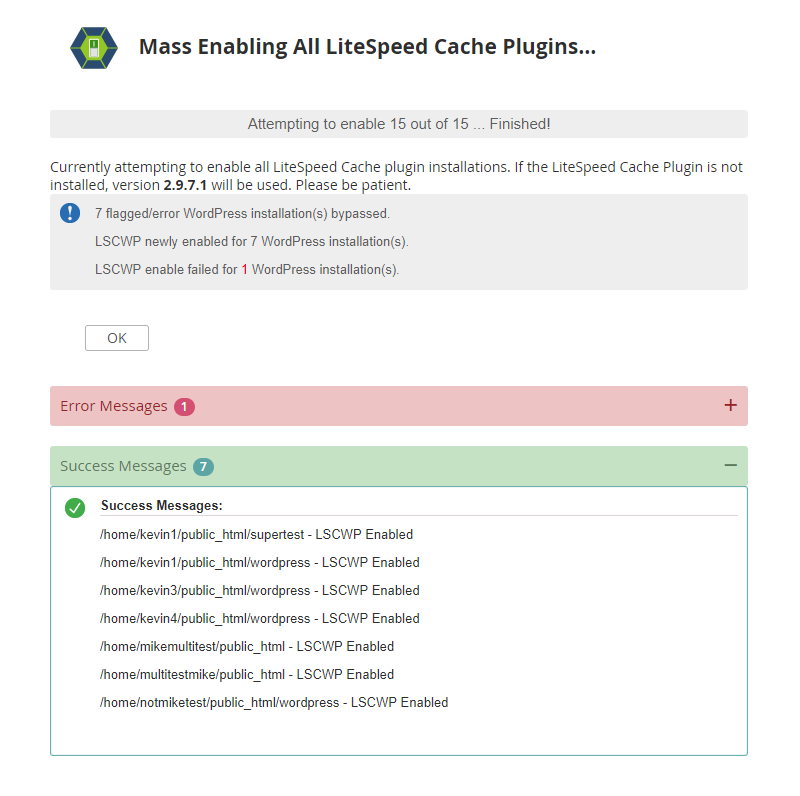
After this operation is complete you will get a short summary message letting you know how many installations had LiteSpeed Cache for WordPress enabled/disabled successfully and how many failed, as well as how many flagged installations were detected and skipped over. You will also be provided with both an error log and a success log shown under these results listing the installations that were enabled and those that failed along with the related error messages.
Note: If you have not performed a scan before clicking on Mass Enable/Disable Cache buttons, or your previous scan data is unable to be read by the plugin, you will be asked to scan again.
Version Manager
Equivalent CLI commands: setversion, upgrade
Example: ./lscmctl setversion --latest [Go to CLI section]
-
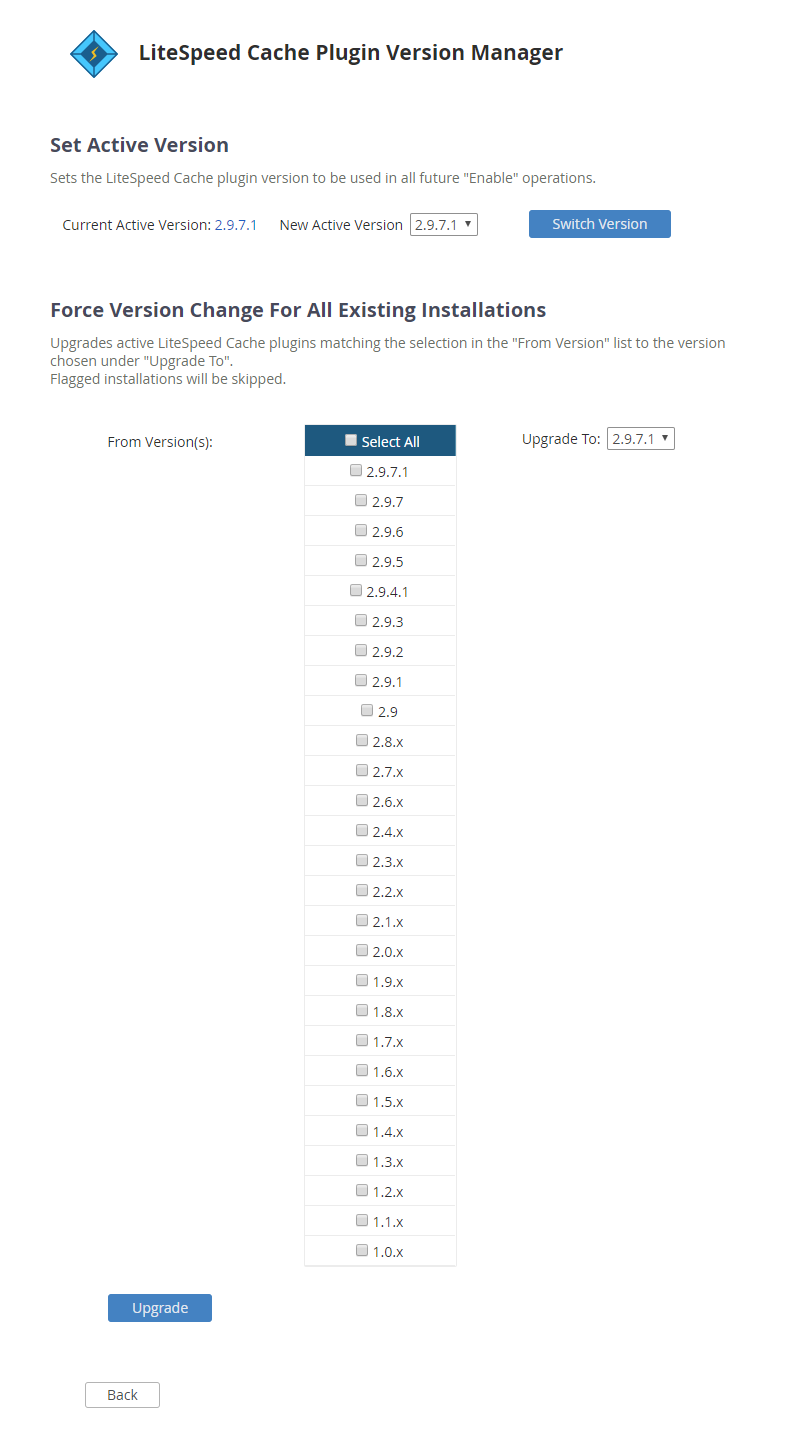
Set Active Version - Allows you to change the Active Version of the LiteSpeed Cache for WordPress plugin. The Active Version is the LSCache for WordPress version that is used when the WHM plugin enables or mass enables caching for WordPress installations.
-
Force Version Change For All Existing Installations - Allows you to change the version of existing LiteSpeed Cache for WordPress installations, allowing you to select which to change based on current cache version.
WordPress Dash Notifier
Equivalent CLI commands: dashnotify, dashnotifyremove
Example:
./lscmctl dashnotify -m -plugin litespeed-cache -msgfile /path/to/msg/file
[Go to CLI section]
The WordPress Dash Notifier feature is used to recommend a WordPress plugin or broadcast an informational message to all discovered WordPress installations. These messages will appear in the WordPress Dashboard of each site.
This tool is especially useful for hosting providers who wish to suggest LiteSpeed Cache for WordPress to their clients, rather than installing it directly for them via Mass Enable.
Recommend A Plugin
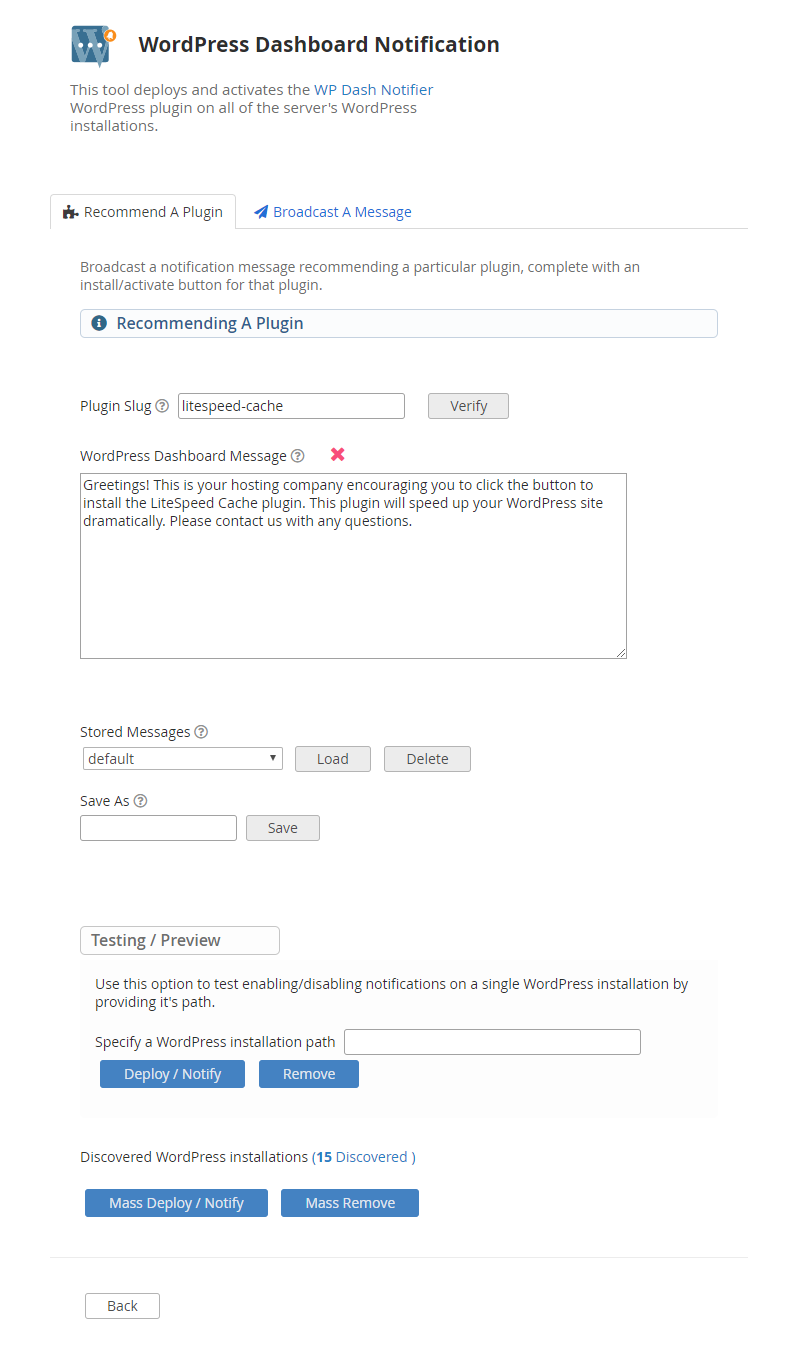
Plugin Slug - The unique slug of a valid WordPress plugin. A download/activate button for this plugin will be included in the displayed notification message.
A plugin's slug can be found by going to the plugin's page on https://wordpress.org/plugins/ and taking the last part of the URL. An entered slug can be verified by clicking the 'Verify' button.
WordPress Dashboard Message - A message displayed when recommending a plugin. Simple text and HTML are supported.
Stored Messages - Saved messages (including Plugin Slug) that can be loaded or deleted. "default" message cannot be deleted.
Save As - Save the current WordPress Dashboard Message and Plugin Slug using a unique ID (a-zA-Z0-9_-).
Testing / Preview - This option allows you to "Deploy / Notify" a plugin recommendation or "Remove" a notification from a single WordPress installation by providing it's path. As the name implies, this is useful for testing how messages will be displayed before notifying en mass.
Mass Deploy / Notify - Recommend a plugin to all discovered WordPress installations. This will install the Dash Notifier plugin for WordPress on all discovered installations and display the recommendation message in their WordPress Dashboard.
Mass Remove - Remove plugin recommendation message (and Dash Notifier plugin) from all discovered WordPress installations.
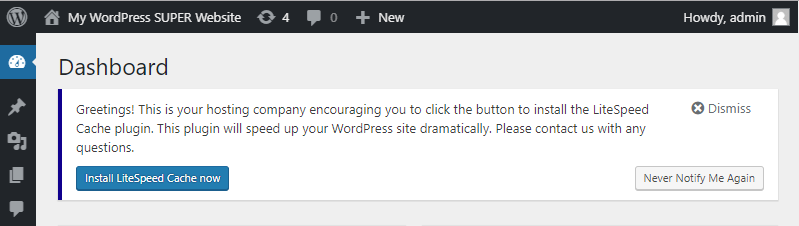
End Result
-
User does not have the plugin ('litespeed-cache') installed:
-
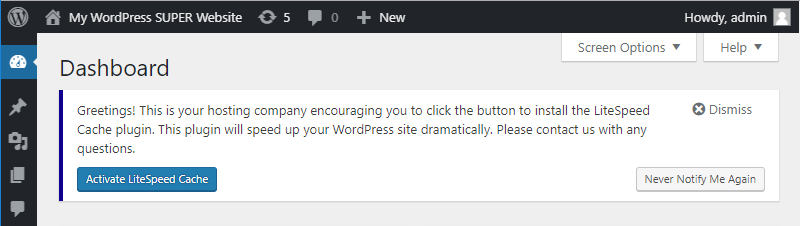
User has plugin ('litespeed-cache') installed, but deactivated:
-
User has 'litespeed-cache' plugin installed and active
No message will be displayed
Broadcast A Message
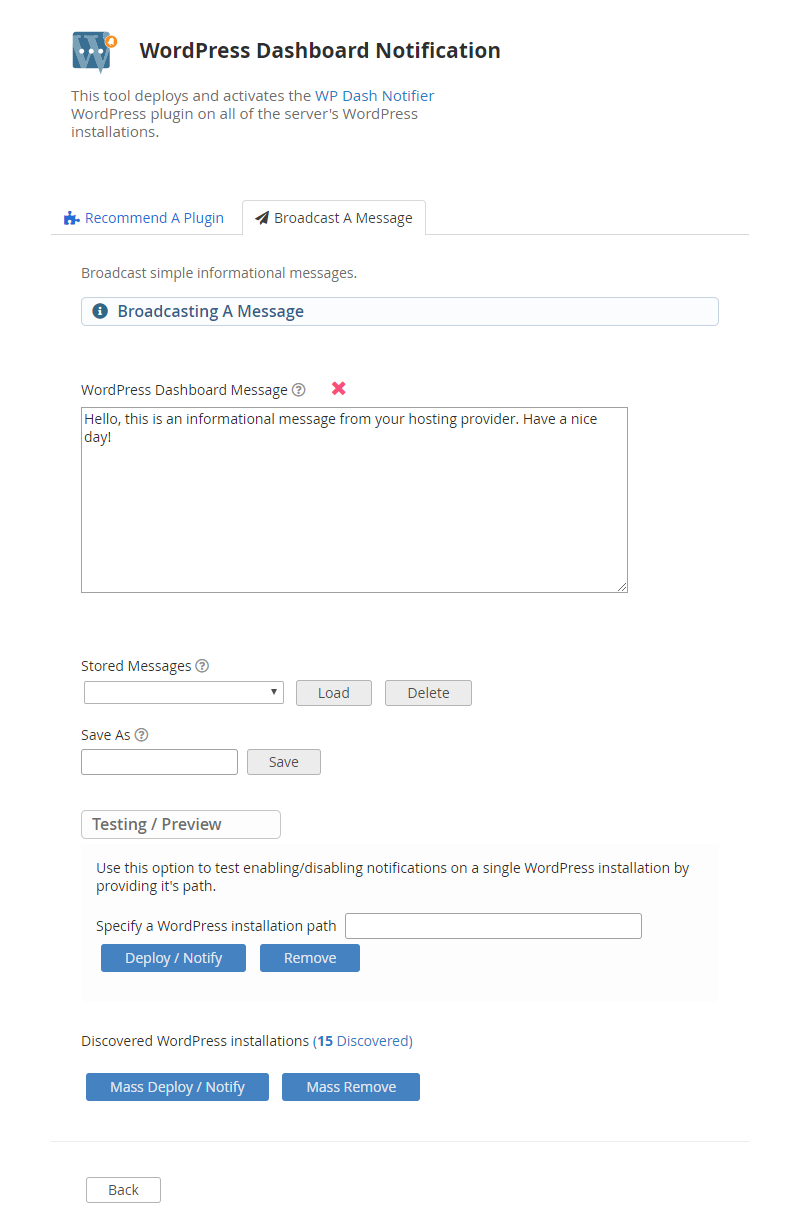
WordPress Dashboard Message - A message displayed when recommending a plugin. Simple text and HTML are supported.
Stored Messages - Saved messages that can be loaded or deleted.
Save As - Save the current WordPress Dashboard Message using a unique ID (a-zA-Z0-9_-).
Testing / Preview - This option allows you to "Deploy / Notify" a notification message or "Remove" a notification from a single WordPress installation by providing it's path. As the name implies, this is useful for testing how messages will be displayed before notifying en mass.
Mass Deploy / Notify - Broadcast a notification message to all discovered WordPress installations. This will install the Dash Notifier plugin for WordPress on all discovered installations and display the notification message in their WordPress Dashboard.
Mass Remove - Remove notification message (and Dash Notifier plugin) from all discovered WordPress installations.
End Result
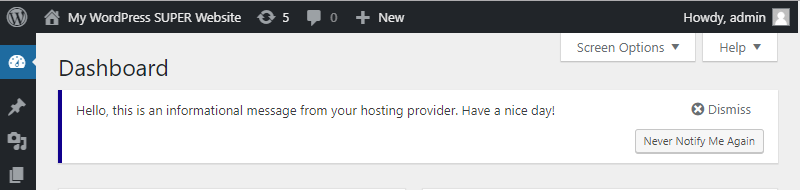
Other Info
-
WordPress users who click the "Dismiss" button will not be re-notified if the provided dashboard message (and plugin slug when recommending a plugin) match those of the dismissed message.
-
WordPress users who click the "Never Notify Me Again" button will have the Dash Notifier plugin uninstalled and a '.dash_notifier_bypass' file created in their installation's root directory. These users will not be notified of any further messages while this file exists.
Testing Caching
To test your domains, you should see X-LiteSpeed-Cache: hit in the
response header. Check
here
for detailed verification steps.
If X-LiteSpeed-Cache: hit cannot be seen, you may need to do more
troubleshooting. For example: check if the LScache feature has been
enabled in your license, if other cache plugins have been disabled, or
if cache root and cache policy have been set, etc.
Command-Line Interface - LiteSpeed Cache For WordPress Management
This section covers the various cache management options available through our lsmctl cli script. Most of these options are also available through our WHM plugin for cPanel.
As of LiteSpeed Enterprise 5.1.14, a command-line interface script was
added under /usr/local/lsws/admin/misc/lscmctl for executing basic
cache management actions through the terminal or in a cron job. As of
versions 1.4 of the script, the ability to recommend a plugin or
broadcast a message to all discovered WordPress installations is also
available. The help page for this script is included below.
Learn more about the CLI script on our blog.
Supported Control Panel Environments: cPanel/WHM and Plesk
Note: You must have a license with LSCache enabled to use these features. How To Get LSCache
LiteSpeed Cache Manager CLI Tool v1.10.0.1


Usage: ./lscmctl [-php path/to/php] command [flag/parameter]


Possible Commands:

setcacheroot [-svr <cache root>] [-vh <cache root>]
    List/Set server and/or virtual host cache roots. This command will list the
current server and virtual host cache roots when no additional input is given.
Use -svr and -vh to set those cache roots. The '$' character is not allowed
when setting virtual host cache root. Virtual host cache root values starting
with a '/' will automatically have '/$vh_user' appended to the end (this format
was chosen to maintain compatibility with CageFS).

setversion [{--list | --latest | <version>}]
    List/Set active LSCWP version. This command will list the currently active
version when no additional input is given. Use --list to show available
versions or --latest to switch to the latest available version. A valid version
number can also be provided to switch to that version specifically. This must
be set before performing other lscmctl operations.

scan [-n] [-e]
    Scan for all WordPress installations. This command will create an lscm.data
file under the "lsws/admin/lscdata" directory. Add the -n flag to only discover
new installations. By adding the -e flag, LSC-WP will be enabled on all
installations after scanning is complete.

enable {-m | <wp path>}
    Enables LSWCP for all discovered WordPress installations with the -m
parameter or a single installation by providing the path to the WordPress
installation directory.

disable {-m | <wp path>}
    Disables LSWCP for all discovered WordPress installations with the -m
parameter or a single installation by providing the path to the WordPress
installation directory.

upgrade {-m | <wp path>}
    Upgrade LSWCP for all discovered WordPress installations to the current
active version with the -m parameter or a single installation by providing the
path to the WordPress installation directory.

flag <wp path>
    Flag a single WordPress installation. Flagged installations will be skipped
during mass operations.

unflag {-m | <wp path>}
    Unflag all discovered WordPress installations with the -m parameter or a
single installation by providing the path to the WordPress installation
directory. Flagged installations will be skipped during mass operations.

status <wp path>
    Get the most up to date LSC-WP status for the provided WordPress
installation.

dashnotify {-m | -wppath <wp path>} [-plugin <plugin slug>] {-msgfile <message file path> | -msg <message>}
    Notify all discovered WordPress installations with the provided message
(plain text or HTML) using the Dash Notifier WordPress plugin with the -m
parameter or a single installation by providing the path to the WordPress
installation directory. A plugin slug can be included to have an
install/activate button for that plugin added to the message as well.
Installations containing a '.dash_notifier_bypass' file will not be notified.

dashnotifyremove {-m | <wp path>}
    Remove Dash Notifier plugin (and notification messages) from all discovered
WordPress installations with the -m parameter or a single installation by
providing the path to the WordPress installation directory.

cpanelplugin {--install | --uninstall | -autoinstall [{0 | 1}]}
    [cPanel/WHM Environment Only] Install or uninstall the LiteSpeed user-end
plugin for cPanel for all cPanel accounts using the '--install' and
'--uninstall' input flags. The plugin will appear as "LiteSpeed Web Cache
Manager" under 'Advanced' in the user's cPanel dashboard. The '-autoinstall'
input param can be used to check the current auto install status. When turned
on, the cPanel plugin will be automatically installed when installing/updating
the WHM plugin. Use '-autoinstall {0 | 1}' to manually turn this off and on
respectively.

addinstalls {-wpinstall <wp path> <docroot> <server name> <site url>} | -wpinstallsfile <installs file path>}
    Add a WordPress installation to existing scan data. This "custom" data will
be stored in it's own lscm.data.cust data file under the "lsws/admin/lscdata"
directory. A single installation can be added using the -wpinstall parameter
with space separated list of installation info in the required order (<wp path>
<docroot> <server name> <site url>). Multiple installations can be added at
once using the -wpinstallsfile parameter to provide the path to an installs
file containing a newline separated list of installation info in the expected
format.

--update-lib
    Update the lscmctl script and the required shared library to their latest
versions only if the currently installed versions are no longer supported.

--force-update-lib
    Force update the lscmctl script and the required shared library to their
latest versions. It is not recommended that this command be included in any
cron jobs, use command '--update-lib' instead.


Example Usage:

  List server and virtual host cache roots:
  ./lscmctl setcacheroot

  Set virtual host cache root:
  ./lscmctl setcacheroot -vh /path/to/ssd/lscache

  Display currently active LSCWP version:
  ./lscmctl setversion

  Display selectable LSCWP versions:
  ./lscmctl setversion --list

  Set active LSCWP version to latest available:
  ./lscmctl setversion --latest

  Set active LSCWP version to v1.5:
  ./lscmctl setversion 1.5

  Discover all installations:
  ./lscmctl scan

  Discover new installations only, passing in path to PHP binary:
  ./lscmctl -php /path/to/php/ scan -n

  Enable LSC-WP on all discovered installations:
  ./lscmctl enable -m

  Disable LSC-WP for a single installation:
  ./lscmctl disable /home/user/public_html/wp

  Get LSC-WP status for a single installation:
  ./lscmctl status /home/user/public_html/wp

  Send a simple dashboard message to a single discovered WordPress installation:
  ./lscmctl dashnotify -wppath /path/to/wp/install -msg "Hello World!"

  Broadcast a dashboard message recommending the LiteSpeed Cache for WordPress plugin to all discovered WordPress installations:
  ./lscmctl dashnotify -m -plugin litespeed-cache -msgfile /path/to/msg/file

  Remove dashboard notifications (and Dash Notifier plugin) from all discovered WordPress installations:
  ./lscmctl dashnotifyremove -m

  [cPanel/WHM Environment Only] Install the LiteSpeed user-end plugin for cPanel for all cPanel accounts:
  ./lscmctl cpanelplugin --install

  [cPanel/WHM Environment Only] Turn off auto install for the LiteSpeed user-end plugin for cPanel:
  ./lscmctl cpanelplugin -autoinstall 0

  Add a single WordPress Installations to custom data file.:
  ./lscmctl addinstalls -wpinstall /home/user/public_html/wp /home/user/public_html user.com user.com/wp

  Add multiple WordPress Installations to custom data file using an installs file.:
  ./lscmctl addinstalls -wpinstallsfile /path/to/installs/file
Scan And Enable Using A CronJob
If you do not want to continue manually running the CLI script you can setup a cronjob to run the script at fixed intervals instead.
First, as root, open crontab cronjobs with command
crontab -e
After that, you can add a line, in the usual cronjob format, similar to the following:
00 03 * * * /usr/local/lsws/admin/misc/lscmctl scan -e
This command will run the CLI script daily at 3am, re-discovering all current and new WordPress installations and mass enabling LSCWP on any unflagged installations.
Domain Missing in WHM Mass Operations
When running Mass Enable and Mass Disable operations in LiteSpeed's WHM plugin, a list of the server's domains is displayed. The plugin should automatically detect and display all domains, but what if it doesn't?
Fatal WordPress Error
If the WHM plugin encounters a fatal error when trying to load the WordPress environment, the domain will be removed from the list of those automatically detected. In order to solve this problem, you need to determine what has caused WP's fatal error.
Possible Cause: Undefined Function
One possible cause for a fatal error is a call to an undefined function.
The WHM plugin loads WordPress with the SHORTINIT constant. SHORTINIT
collects basic information and prevents the bulk of WP from being
loaded. This is the most efficient way for our plugin to gather what it
needs from each WP installation on your server.
If you are calling functions in wp-config.php, they may cause a fatal
WP error in a SHORTINIT situation.
For example, say you have a line like this in your wp-config file:
update_option('siteurl', 'http://example.com' );
The update_option() function uses another function,
sanitize_option(), in its code, but sanitize_option() has not been
loaded because of the SHORTINIT constant. This results in the fatal WP
error that causes the WHM plugin to skip over that domain in its list of
detected domains.
The Solution
If you are calling functions as part of your wp-config file, you'll need to verify that they are not, in turn, using undefined functions. If they are, you can add a simple conditional statement to your code to avoid a fatal error. Like so:
if ( function_exists('sanitize_option') ) {
    update_option('siteurl', 'http://example.com' );
}
A more generic example:
If function1() calls function2() and function2() is undefined when
loading WP with SHORTINIT, then you can replace this:
function1();
with
if ( function_exists('function2') ) {
    function1();
}
Troubleshooting
In the above example, the problem was easily found one function deep in the code, but that will not always be the case. To ferret out where the error is happening, you may need to do one or both of the following things:
-
Check the WordPress error log for the missing domain.
-
Follow the trail in the WordPress Codex Function Reference to see which functions use which other functions.
WHM Plugin - Cache Manager Error Status
While using the Web Cache Management feature of our WHM plugin, you might occasionally see an installation listed with an "Error" status.
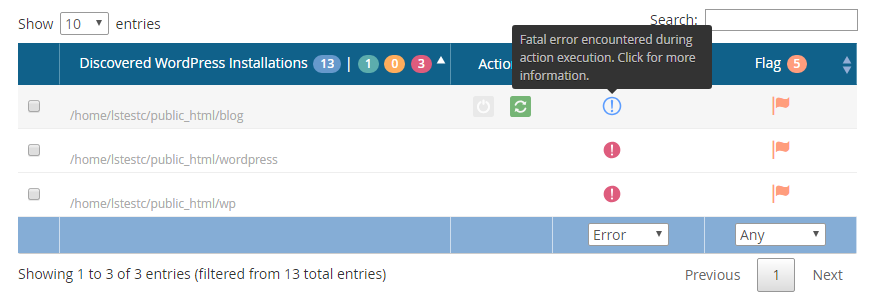
By hovering over the "Error" text, a small explanation as to the cause of the error will be displayed. Here we will list out and explain these possible errors and what can be done to fix them.
Fatal Error Encountered During Action Execution
This message indicates that PHP encountered a fatal error while loading the WordPress environment and trying to perform some action.
Cause: This most commonly indicates that the installation is invalid in some way, such as a broken backup/testing installation that was detected during scan.
Resolution: Most of the time these installations can be ignored
without issue. In the rare case where an installation is working as
expected but is still detected with this error, please running command
lsws/admin/misc/lscmctl --update-lib and trying again. If this still
does not resolve the issue please contact our support team
for further investigation.
Timeout Occurred During Action Execution
This message indicates that PHP timed out while loading the WordPress environment and trying to perform some action.
Cause: This error is most commonly caused by custom code added in a user's wp-config.php file. If the code runs into some issue when executed by our script call, it may hang.
Resolution: If the installation is working as expected, you may try to manually locate the code which is causing the error and fix/remove it. If you are in need of assistance you may contact our support team for further investigation. Just be aware that this issue likely falls outside of free support.
Could Not Retrieve WordPress siteURL
This message indicates that the installation was successfully discovered as a valid WP installation, but siteUrl could not be retrieved from WordPress.
Cause: WordPress' get_option() function failed to retrieve a
siteUrl.
Resolution: Since this error usually indicates some kind of database issue with WordPress, please contact our support team for further investigation, if you know this to be a working WordPress site.
Could Not Match WordPress siteURL To A Known cPanel Docroot
This message indicates that the siteUrl retrieved from WordPress did not match any known cPanel document roots.
Case 1
Cause:: Missing cPanel userdata for the installation. Without this userdata, the correct document root cannot be retrieved from cPanel.
Resolution: Case 1: This can be resolved by validating this user
account and domain in cPanel. If set up correctly, you should find an
entry for the site in the %%/var/cpanel/userdata/$user/%% directory.
Case 2
Cause:: The siteUrl set in the WordPress backend is incorrect. This
can happen when the WordPress site is set up using mod_userdir
(resulting in an IP being set for siteUrl) or the siteUrl has been
changed to an incorrect value in the WordPress backend.
Resolution: This can be resolved by simply changing the value of siteUrl in the WordPress backend to use the site's fully qualified domain name. After which, a document root match should be found.
Could Not Find A Valid wp-config.php File
This message indicates that we could not find a possible wp-config.php
file for that specific installation.
Cause: When looking for an installation's wp-config.php file, the
installation's root directory and parent directory are both checked for
a valid copy. If one cannot be found, or the discovered wp-config.php
file is believed to belong to a different WordPress installation (i.e.
it is discovered in a parent directory also containing a
wp-settings.php file), then this error is set.
Resolution: Confirm that this installation has a valid
wp-config.php file. If the wp-config.php file is kept more than 1
directory above the root installation using symbolic links, it will need
to be moved to the installation root or parent directory.
Still Need Help?
If you are still running into issues after learning about the cases above, please contact our support team for further assistance.